There are four basic site types we suggest for academic use. Once you’ve decided on what sort of site you want, follow the easy setup instructions to get started.
1. Site with only one page
This is just a single page. Examples of how you might want to use it include posting your syllabus or CV, creating a page of important links, or advertising an event.
2. Basic Website
This type of site is good for basic information. It has multiple pages and a navigation menu. A Basic Website works well as an instructional resources site, an organizational site, or a faculty or student website. This type of site is NOT what you want if students will be sharing their own work. For that, you will want a Full Website (see #4 below).
3. Basic Blog
This is good for keeping a journal of a trip, a research project, etc. Anything where you are going to want to write short daily entries that users can browse through. The homepage will be a list of your latest posts or an alphabetical listing of posts.
4. Full Website
A Full Website combines the functionality of a Basic Website and a Basic Blog. It has static pages like a Welcome page and an about us page, but also allows for student posts. A Full Website is the best choice for a course website where the faculty member wants to have a homepage introducing the site to the class (and the outside world) but also uses posts to showcase student work.
1. Site with only one page directions
This is just a single page. It’s good for posting your syllabus, CV, important links, or to advertise an event. Not what you’re looking for? Go back to top of page.
-
Customize
Click the “Customize” button at the top of the page.

The Customize menu will appear to the left of this page.
-
Site Identity
On the Customize menu, select Site Identity.

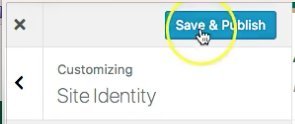
Here you can change the title and the tagline, then click the “Save and Publish” button
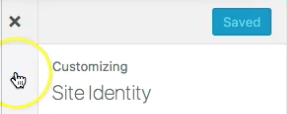
Now click the arrow below the X at the top left to return to the Customize menu.
-
Site Layout
Select Site Layout

Select Full Width Content
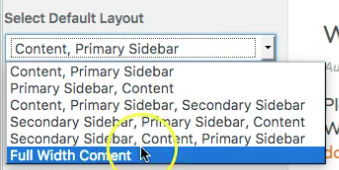
Click Save and Publish and then click the arrow at the top left to return to the menu.
-
Static Front Page
Click Static Front Page

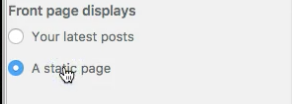
Under Front Page Displays, select Static Front Page
Select +Add New Page
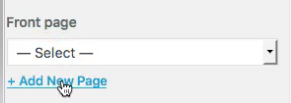
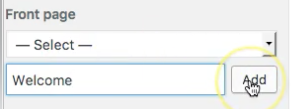
Give it a title and click Add
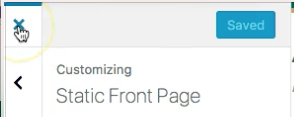
Click Save and Publish, then click the X at the top left to return to your site
-
Edit
Click edit right under the new Page title

Edit the page. You’re done!
If you prefer to watch me go through the steps, you can view the tutorial below:
2. Basic Website Directions:
This is good for an informational site. Similar to a single page site above, but with a navigation menu to allow for multiple pages. It works as an instructional resources site, an organizational site, a faculty or student website, or more. While it’s fine for a course site for a faculty member to post information, it isn’t as good for a course site where students will be sharing their own work. For that, you will want a full website (jump to #4 below). Not the kind of site you’re looking for? Go back to top of page.
-
Customize
Click the “Customize” button at the top of the page.

The Customize menu will appear to the left of this page.
-
Site Identity
On the Customize menu, select Site Identity.

Here you can change the title and the tagline, then click the Save and Publish button

Now click the arrow below the X at the top left to return to the Customize menu

-
Create Pages
Click Static Front Page

Under Front Page Displays, select Static Front Page

Select +Add New Page

Title this page Welcome or something similar and click Add. Repeat this procedure to create the other pages you want on your site. Don’t worry if you don’t know all the pages you want right now. You can add and delete pages later. I suggest for starters, you create an About Us page and a Contact page

Click Save and Publish. Before you click the back arrow to return to the main menu, select “Front Page Displays: Your Latest Posts,” otherwise, you will lose this page of directions before you’re done
-
Menu
Select Menus

Select + Add a Menu

Type a menu name in the New Menu name dialog box and click “Create Menu”

The new menu window will appear and now it’s time to add items to the menu. Click the “+ Add Items” button

Select the pages you want to add to the menu. If you need to add a new page, you can click the “+ Add New Page” button below th list of existing pages

Pages you select for the menu will show up on the left column in the order they will appear on the menu. You can drag and drop these items to change the order

Click “Save and Publish”

Now that the menu has been created, we have to decide on the menu location. Select “Menu Location”

This theme has two possible menu locations. I prefer the secondary menu location. Pull down the dropdown menu by the secondary menu location and select the menu you just created


Save and Publish and then hit the back arrow to return to the Customize menu
-
Sidebar Widget
A basic website benefits from a searchbox on the sidebar. Here’s how to get create it:
Select “Widgets”from the left menu
Select “Primary Sidebar”

Select “+Add a Widget”

Scroll down and select “Search”

Click “Save and Publish” at the top of the menu, then click on the back arrow right below that to return to the Customize menu
-
Static Front Page
Click Static Front Page

Under Front Page Displays, select Static Front Page

Select +Add New Page

Give it a title and click Add

Click Save and Publish, then click the X at the top left to return to your site

-
Edit
Click edit right under the new Page title

Edit the page. You’re done!
If you prefer to watch me go through the steps, you can view the tutorial below:
3. Basic Blog Directions:
This is good for keeping a journal of a trip, a research project, etc. Anything where you are going to want to write short daily entries that users can browse through. The homepage will be a list of your latest posts. Not the kind of site you’re looking for? Go back to top of page.
-
Customize
Click the “Customize” button at the top of the page.

The Customize menu will appear to the left of this page
-
Site Identity
On the Customize menu, select Site Identity.

Here you can change the title and the tagline, then click the Save and Publish button

Now click the arrow below the X at the top left to return to the Customize menu

-
Sidebar Widget
A blog site benefits from a couple of “Widgets” on the sidebar: A search box and a list of recent posts. Here’s how to get them:
Select “Widgets”from the left menu.
Select “Primary Sidebar”

Select “+Add a Widget”

Scroll down and select “Search” and then repeat the procedure and add “Recent Posts”


Click “Save and Publish” at the top of the menu. That’s basically it. Click the X at the top left and just start creating posts and they will appear in date order with the latest posts first.
4. Full Website directions:
A full website is a hybrid of a static website with pages like a Welcome page and an About Us page, but also allows for the addition of dynamic entries. A full site is usually best for a course website where the faculty member wants to have a homepage introducing the idea of the site to the class (and the outside world) but also uses posts to showcase student work. Not the kind of site you’re looking for? Go back to top of page.
-
Customize
Click the “Customize” button at the top of the page.

The Customize menu will appear to the left of this page.
-
Site Identity
On the Customize menu, select Site Identity.

Here you can change the title and the tagline, then click the Save and Publish button

Now click the arrow below the X at the top left to return to the Customize menu

-
Create Pages
Click Static Front Page

Under Front Page Displays, select Static Front Page

Select +Add New Page

Title this page Welcome or something similar and click Add. Repeat this procedure to create the other pages you want on your site. Don’t worry if you don’t know all the pages you want right now. You can add and delete pages later. I suggest for starters, you create an About Us page and a Contact page

Click Save and Publish. Before you click the back arrow to return to the main menu, select “Front Page Displays: Your Latest Posts,” otherwise, you will lose this page of directions before you’re done.
-
Menu
Select Menus

Select + Add a Menu

Type a menu name in the New Menu name dialog box and click “Create Menu”

The new menu window will appear and now it’s time to add items to the menu. Click the “+ Add Items” button

Select the pages you want to add to the menu. If you need to add a new page, you can click the “+ Add New Page” button below th list of existing pages

Pages you select for the menu will show up on the left column in the order they will appear on the menu. You can drag and drop these items to change the order

Click “Save and Publish”

Now that the menu has been created, we have to decide on the menu location. Select “Menu Location”

This theme has two possible menu locations. I prefer the secondary menu location. Pull down the dropdown menu by the secondary menu location and select the menu you just created


Save and Publish and then hit the back arrow to return to the Customize menu
-
Sidebar Widget
A full website benefits from a searchbox and a list of recent posts on the sidebar. Here’s how to get create them:
Select “Widgets”from the left menu
Select “Primary Sidebar”

Select “+Add a Widget”

Scroll down and select “Search” and then repeat the procedure and add “Recent Posts”


Click “Save and Publish” at the top of the menu, then click on the back arrow right below that to return to the Customize menu
-
Static Front Page
Click Static Front Page

Under Front Page Displays, select Static Front Page

Select +Add New Page

Give it a title and click Add

Click Save and Publish, then click the X at the top left to return to your site

-
Edit
Click edit right under the new Page title

Edit the page. You’re done!